Influence Maps
- Adel Talhouk
- Apr 6, 2021
- 4 min read
Updated: Feb 9, 2022
Many games and genres of games make use of a sort of grid. Grids are composed of individual cells and can split up the game world into a flexible and highly adaptable "map". This is great for many AI techniques, and is essential to pathfinding. Generally, cells have an associated cost to them, which represents the ease of traversal, allowing AI agents to find more optimal paths from a location to a destination, relying almost entirely on the grid.
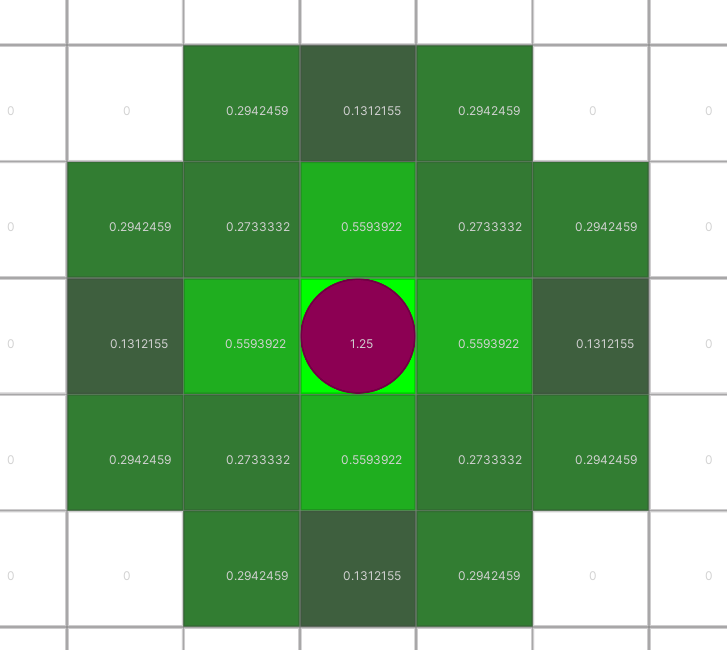
Tower defense games, for example, have AI enemy agents path towards a certain destination. Generally speaking, the agents must survive the towers' attacks, making them choose paths that avoid the towers at all costs (by staying out of their range). But how can this be achieved? This is where influence maps come into play. Essentially an influence map is a grid where each cell has a certain influence value associated with it. This value can represent anything you like, depending on the design and goal of your project, but in tower defense games, influence generally represents a tower's influence on a certain cell. As you will see in the demo, the higher the influence on a cell, the more costly it is to have that cell in the path. In my demo project, I have the cost of a cell equal to the influence exerted on said cell, I did not add other factors (such as terrain elevation or roughness) just to simplify the demonstration and get the point across.
I will not go over all details surrounding the zombies, towers, and round systems, instead, I will explain how I implemented the influence maps, and how the influence is used in the gameplay.
As I mentioned, each cell has a cost associated with it. Since in my demo, a cell's cost is
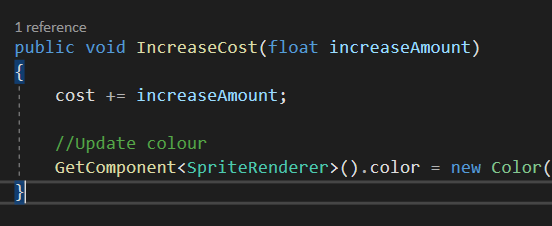
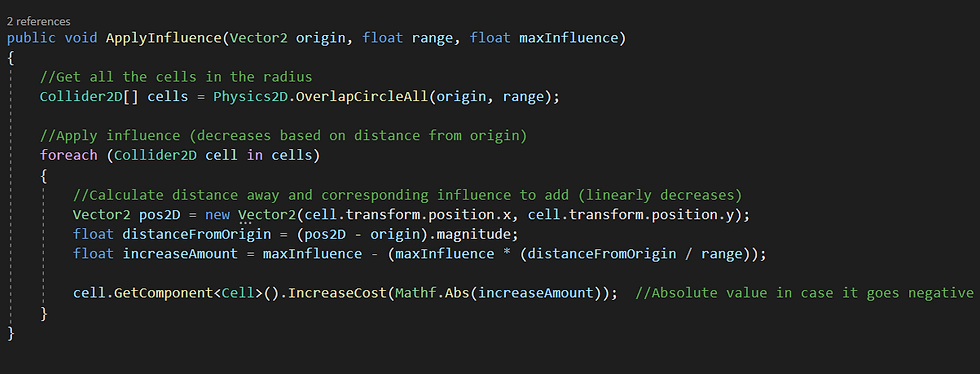
equal to the influence being applied to it, the Cell also has a method to increase its cost (the colour is just green, with the alpha value corresponding to the cost - I use Mathf.Min(1f, cost) to ensure it does not go over 1). Whenever a tower is placed in the grid, I call a method to apply the influence to the grid, which allows the cells within the range to update their costs. I do this using an overlap circle with a radius equal to the tower's range, and apply the influence based on the maximum influence value and the distance of a cell from the tower's position (origin).
For my demo, I also have each tower have a reference to all the cells they influence. I do this so that they know which cell has zombies in it, and calculate which one to attack based
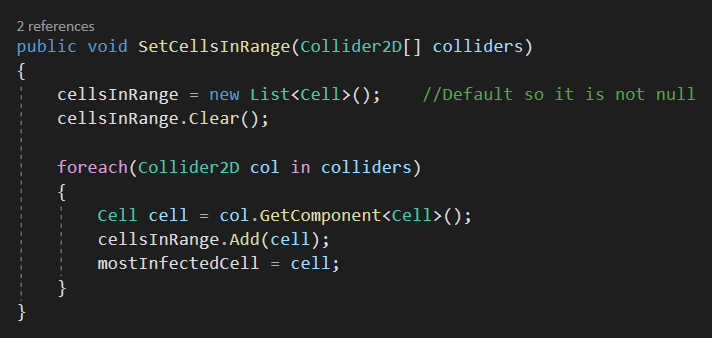
on the number of zombies in the cell (each cell is able to keep track of the number of zombies in it and return that value through a simple accessor). The cells a tower has influence over was just calculated in the ApplyInfluence( ) method above, therefore I use the same calculation to set the cells a tower can influence upon its creation. The mostInfectedCell gets assigned simply by iterating over all the cellsInRange and calling the accessor for the zombiesInCell integer. When calling the SetCellsInRange( ) method, the Array of Collider2Ds is simply the same Physics2D.OverlapCircleAll(pos, cannonRange), with pos corresponding to the spawn position of the tower (or origin in ApplyInfluence( )), and cannonRange (this example code was taken from the spawning of a cannon tower) corresponding to the range (same range passed into ApplyInfluence( )).
So that was a little on the gameplay logic, but where do influence maps directly come into play?
When zombies spawn, they run the A* Pathfinding Algorithm (see links below) to get from their spawn position to the destination (simply the bottom left of the screen). After the towers are spawned and the cells on the grid have their cost updated according to the influence exerted by the towers, the zombies will be left with a grid of cells of varying costs. Running A* will allow them to find an optimal path to their destination, meaning a path along which they avoid the towers to the best of their ability.
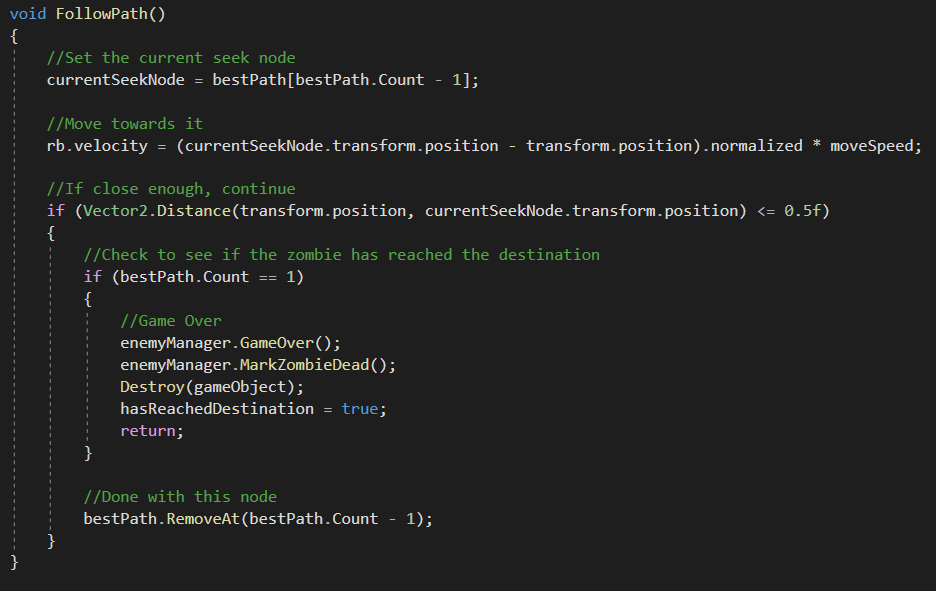
In my testing, I saw the algorithm return an amazing path, but I think that is because all cells with no influence on them have a cost of 0, so the heuristic value plays a huge role in calculating the shortest/cheapest path. I saw zombies prefer to go through the furthers range of a tower (because it has the lowest influence at the edge of the range) rather than path around it, because the path would have been longer (bigger heuristic). When coding the towers and their logic, I did not make the projectiles deal less damage the further they travel, so it makes the AI seem unintelligent (which is fitting, they are supposed to be zombies after all).
In my demo, each round spawns 1.25 times more zombies that the previous round (rounded to an integer value for the number to spawn). When a zombie spawns, it calculates a path towards the destination from its spawn position. After around round 8, I noticed a bit of frame drops, and I knew it was due to the repeated calculation of the A* algorithm. I did not implement any performance-boosting techniques to improve framerate, but in my next implementation of Influence Maps for a similar game, I will probably end up implementing a Flow Field (read this blog post) to improve performance. Other ideas I had to improve framerate were the implementation of Interruptible Pathfinding or Node Array A*, but again, I did not end up implementing any of these techniques.
Demo Repository: https://github.com/adel-talhouk/gpr-440-01_advanced_ai
References and Further Reading:
Game AI Pro - Chapter 30: Modular Tactical Influence Maps - Dave Mark
Node Array A* (starting p. 229): Millington, Ian, and Funge, John. Artificial Intelligence for Games - Second Edition. Morgan Kaufmann Publishers, 2009. Amazon link


Comments